This is a really fun category, this is where understanding light will play a big part in creating some truly imaginative images. Photography is all about the way you can harness light to capture the subject in its most interesting form, adding a little trickery can really add to these images making a truly imaginative result. And of course, can be a lot of fun along the way.
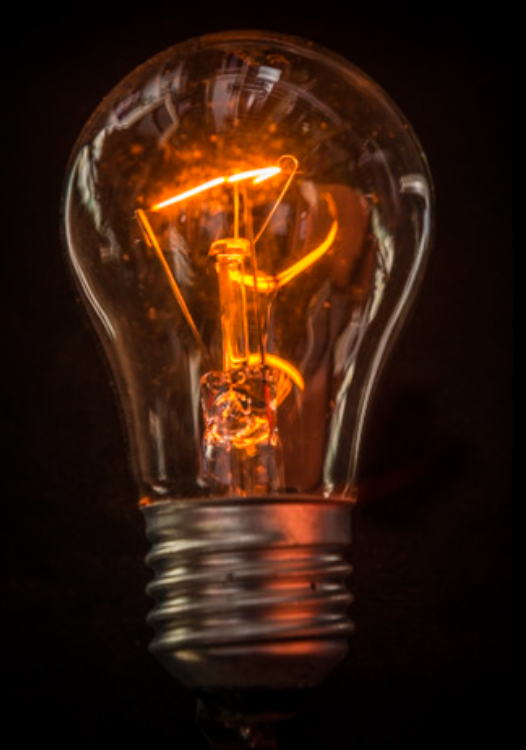
Photography is all about capturing light, so with that in mind, I wanted to see if I could capture the amber glow from a lamp but still see the elegance of the thin glass encompassing it.
Capturing the glow from the lamp
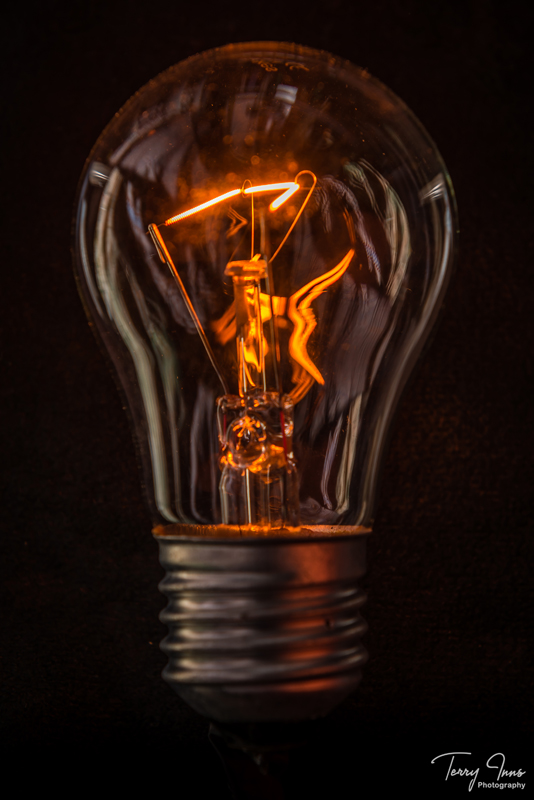
When starting out on a project like this, you need to have a think about the results that you are looking for. In this case, I was looking to capture the glow from the lamp while showing the detail of the lamp itself without any lamp holders to create a suspended in air feel.
Bright flames
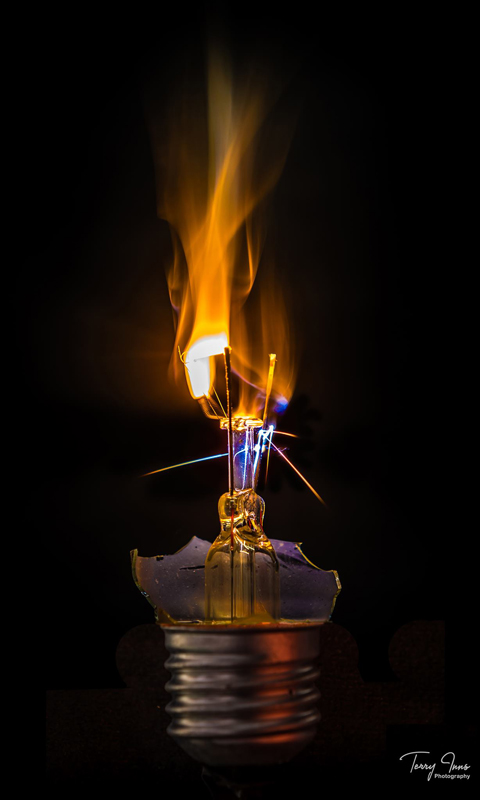
Initially I'll be honest, the image I was looking to create was something more like this one, where the glass of the lamp was smashed and the camera captured the filament as it burst into flames. But that's probably a little bit too complicated for this tutorial. So I will get back to explaining how I created the image above, with clean lines and a rich amber glow.
Below you can see some of the images that I captured along the way to explain what I did.
Firstly I decided that I wanted the lamp to be floating in air, so I needed to find a way of powering it without having it sat in a conventional lamp holder. Of course you may decide this next bit is not for the feint hearted (Or unqualified).. Being an electrician in a former life, I decided that I would solder live and neutral wires to the lamp fitting itself, one on the very end contact and one to the side of the screw fitting, this was a bit tricky but I managed to make good connections. Next, I tool those wires to a standard household wall dimmer switch, and then connected from a fused plug, mains electricity to the dimmer switch.
Construction
So now I have a lamp that I can adjust the intensity of using my dimmer switch. The next task was to suspend it in front of a black backing to minimise any unsightly clutter creeping into my image. (You will note if you look very closely that I didn't completely succeed - next time I will choose a less cluttered room for my projects)
For this I was quite fortunate that the cable that I had soldered on was thick enough and strong enough to suspend the lamp from in a position that I wanted, all I needed to do was clamp the cable to the back of the wood I was using to site the lamp for the picture.
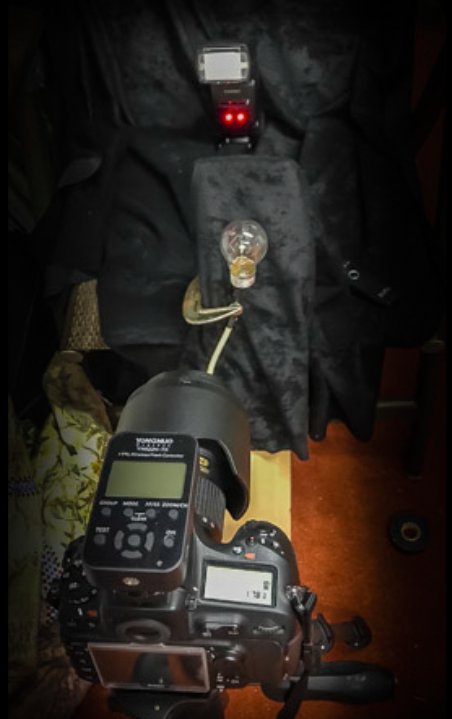
My set-up for the shot
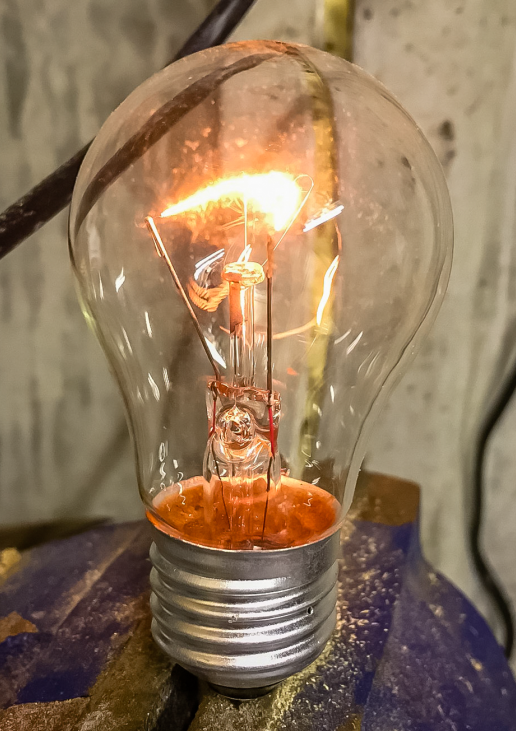
The next challenge was in getting just the right settings for my camera to let in just enough light to pick up the amber glow of the filament while not picking up too much of the background or reflection. As you can see from the image below, my first few attempts did end up showing a little too much of the clutter behind me.
As you can see, the set up is a little Heath Robinson but it was effective enough for the results that I was aiming for. and besides, this wasn't intended to win any photography awards, it was merely a weekend project where I was trying out a new idea. So that's my excuses over with, back to the matter in hand.
The flash that you can see above the lamp was to create some illumination in the glass, to highlight the outline of the lamp itself, having the flash pointing towards the lamp from in front was only making the glass either invisible or adding too much reflection.
Finally I thought I would show you how cluttered my work space was and what you need to be conscious of if you attempt to recreate a project like this.
Too much reflection
The flash pointing towards the camera meant that it illuminated everything behind me and that then reflected in the glass of the lamp. Something of a schoolboy error but we live and learn. Any way, the result I think you will see is quite effective and I have learnt more about my photography and about capturing light along the way. In the end, the final image was taken with 1 second exposure at f5.6 and ISO 64 with a rear curtain sync flash.
Making an image like this takes a little bit of planning

Making an image like this takes a little bit of planning but would it surprise you to know, this was taken in broad daylight, outdoors using flash photography.. Well, that's exactly what it was. Two off camera flashes to fool the camera that it was dark, ice cubes to create the splash and food dye to colour the liquid.. You didn't think I would waste good cider did you!!
So this image started out life as a challenge between friends to take a picture representing 'refreshments'
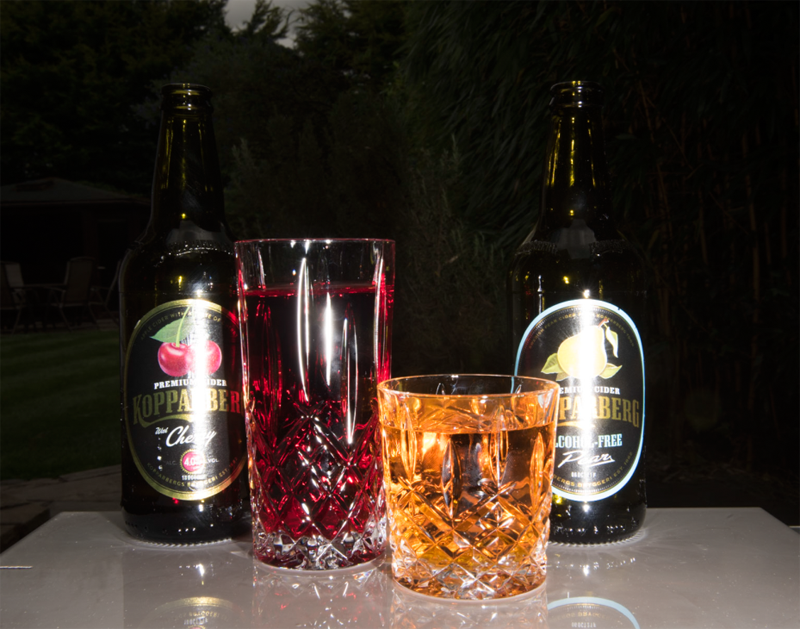
So this image started out life as a challenge between friends to take a picture representing 'refreshments', my daughter at the time had just started drinking alcohol free Koppaberg, I on the other hand had discovered Cherry Koppaberg, not alcohol free I might add.
I wanted to capture a splash of liquid jumping from the glass in front of the bottles depicting the nature of the drink. Making a mess is a guarantee with this project, so as you can see, I took this project outside, in my garden and used whatever props I could find to bring the image to life.
I decided to take some empty bottles from the recycling and set about filling with water and food colouring
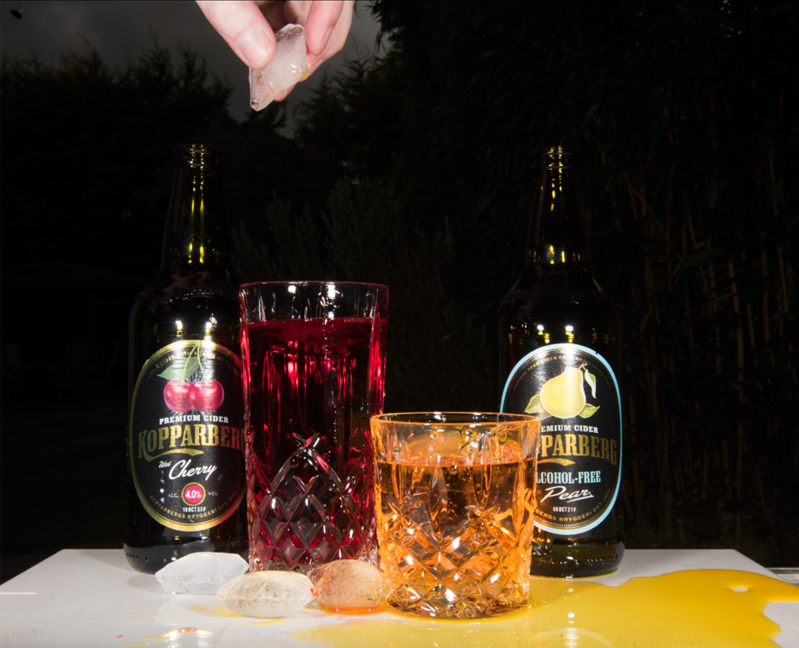
Of course not wanting to waste any tasty real drink, I decided to take some empty bottles from the recycling and set about filling with water and food colouring. This one is a really tricky project as it combines the challenge of getting your settings just right, getting your aim and timing right in dropping the ice and then timing the shutter release at just the right moment. As you can see from the mess in this shot, I had a number of attempts before I felt I'd captured the image I was hoping for.
In the end, this was my set up
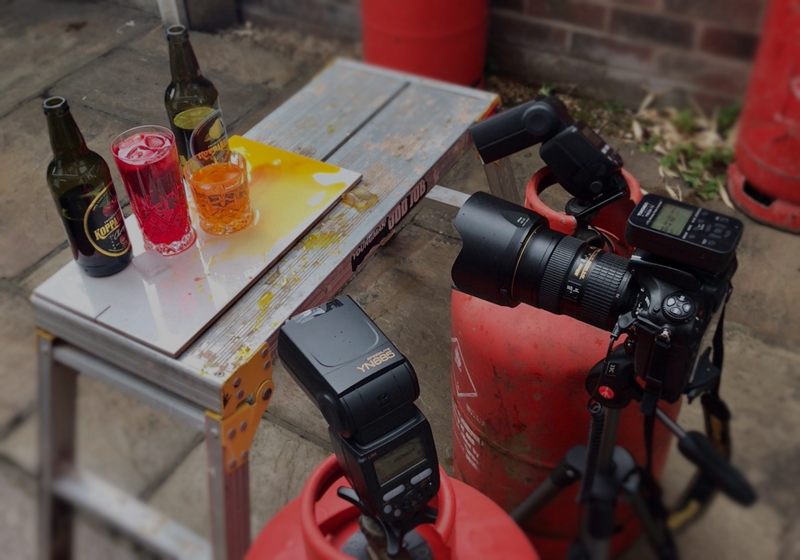
In the end, this was my set up. Two glasses with coloured water, two half full bottles (Again coloured water - not that you can tell) all sat on top of a bathroom tile (Surprising what you find laying around in your shed (Or mine at least!).
Not everyone has a photographic studio at home

Not everyone has a photographic studio at home, but that doesn't mean you can't still create a studio effect, all you need is a flash and a little camera wizzardry to create that studio look and feel.
My daughter (A huge Harry Potter fan)
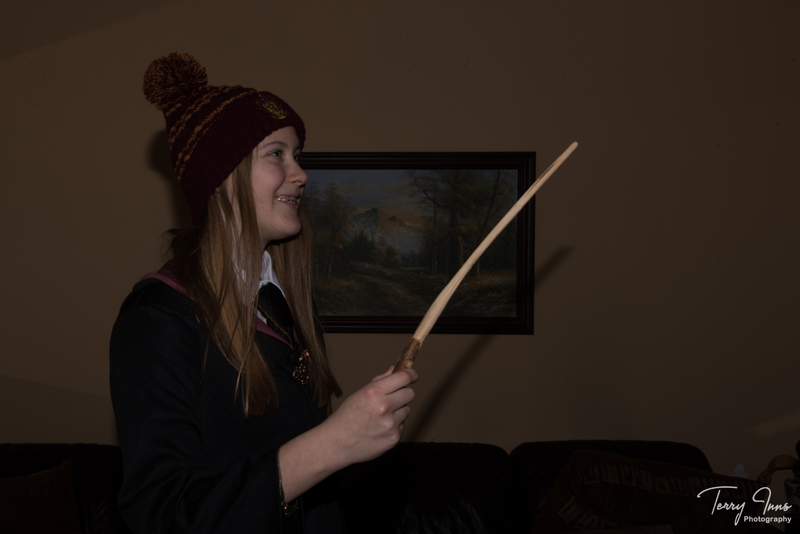
My daughter (A huge Harry Potter fan) wanted some pictures of herself in her Harry Potter costume and that gave me an idea for this article.
As you can see from this image, taking a shot indoor with flash can create some really harsh and distracting shadows that really distract from the image. (Taken at 1/320th sec at f22 ISO 100 with Flash on full power in manual mode).
Unlike the first image, this one was taken outdoors and in the snow believe it or not!.
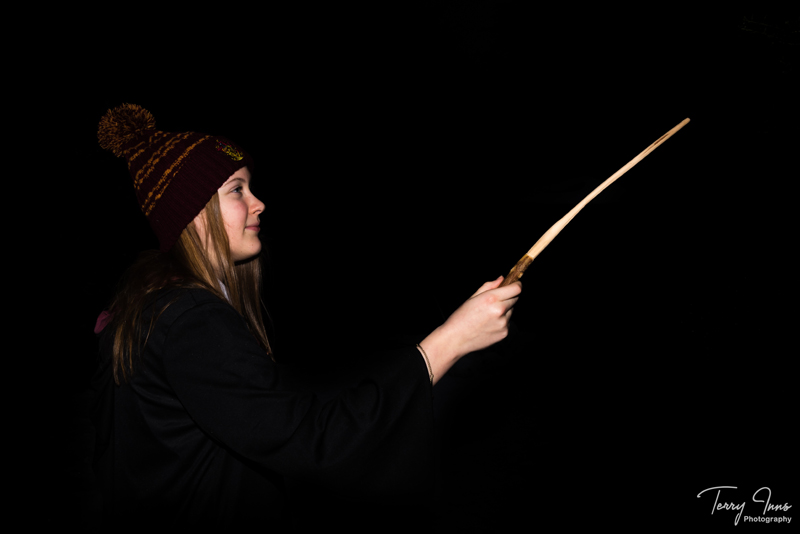
Unlike the first image, this one was taken outdoors and in the snow believe it or not!. (Taken at 1/320th sec at f22 ISO 100 with Flash on full power in manual mode).
The same settings as the first shot but by moving outdoors the time that it took for the flash to hit the background in the garden and reflect back was too long for the camera to capture it due to the fast shutter speed.
In essence the speed of the shutter and the high aperture made the camera blind to the background scenery while the flash was able to illuminate the subject.
Not everyone has a photographic studio at home
Now, not all flashes can fire quickly enough to sync with a shutter speed above 1/250th, but with a little bit of time and patience and in the knowledge of this little trick you should be able to find a setting that separates the background in your shot like the one above. I would suggest starting with an ISO of 100, f20 or above and a shutter speed of around 1/200th sec with your flash on full power. Avoid using TTL (Through The Lens) setting on your flash as the camera will automatically adjust your flash and that is likely to reduce power and spoil the magic!
The final trick to complete this magical shot was to fire up Photoshop and add in a little lens flare using the lens flare filter, a fairly simple addition can make a huge difference to the feel of the shot. Have fun creating some magic!!
After lots of badgering my son finally succumbed to my constant badgering about a photo session. He brought with him some ideas of his own and we set about trying to capture some nice images.
Moody Portraits
.jpg)
After a while of trying and failing to find a shot he was happy with, we decided to get creative and add some coloured gels to the flash heads. This image was captured at 1/200 sec at f18 and ISO31 with three studio flash heads, one with a blue filter, one with a red filter and the third shot behind my son to create a separation from the black studio background.
Hopefully you can see how well the red and blue work with his chequered shirt and the way the colours fall on the two sides of his face to create a really moody shot.
Moody Portraits
.jpg)
.jpg)
Now we were getting somewhere, with one good image under our belts, we were free to experiment further, and a few smiles started to creep in, albeit they were sometimes a little sinister in nature!
Moody Portraits
.jpg)
The final shot in this session was with his guitar and with the use of a yellow light reflecting off the backdrop and still using the red and blue lamps at approximately 45 degrees to the left and right of the camera, we managed to create this great action shot.
Taken at 1/250 sec at f6.3 and ISO64
About this site
TerryInnsPhotography.com has been developed by Terry Inns with the aim of sharing tips tricks and ideas to help fellow amateur photographers in accelerating their own photography tips and skills. If you would like to support this site, please use the contact link and get in touch..